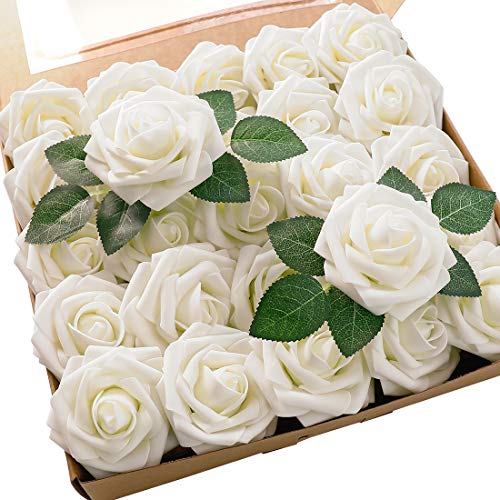
DIY Wedding Guide: Plan Your Dream Day on a Budget
"Your dream wedding doesn't require a celebrity budget. Discover the smart, stress-free approach to DIYing your celebration—without sacrificing style, sanity, or your vision."
Planning a DIY wedding is one of the smartest ways to take control of your celebration—both creatively and financially. Instead of paying a premium for rental companies and florists to assemble cookie-cutter setups, you get to design a day that reflects your personality, your relationship, and your values. But "DIY" doesn't mean "do everything yourself." The most successful DIY weddings are strategically curated: couples identify the 3-5 projects where their personal touch adds the most value, then outsource the rest to trusted professionals.
This guide breaks down exactly which projects are beginner-friendly, which ones are worth the effort, and how to source supplies that look premium without the premium markup. Whether you're planning a small backyard gathering or a 150-guest celebration, the principles here will help you build a wedding that feels intentional, personal, and beautifully yours.
💡 The DIY Reality Check: A DIY wedding saves the most money when you focus on high-impact, low-risk projects. The average US couple spends a significant portion of their decor and stationery budget on items they could make themselves in a few evenings—like centerpieces, place cards, and signage. By reallocating those savings toward photography, food, and music, you create a wedding that looks and feels more expensive than it actually was.
What You Should (and Shouldn't) DIY
The single biggest mistake DIY couples make is assuming that "doing it all yourself" automatically equals "saving money." In reality, some projects cost more in trial-and-error than they save—and a few are genuinely risky to attempt. Here's the honest breakdown.
✅ DIY These (High Savings, Low Risk)
- Wedding arch & backdrop: A bare frame plus silk garlands and zip ties creates a stunning focal point for a fraction of rental costs. See our detailed DIY wedding arch guide.
- Centerpieces: Pre-made floral garlands, candles, and simple vases are beginner-friendly and photograph beautifully.
- Stationery: Invitations, save-the-dates, place cards, and menus are easy to design in free tools and print affordably.
- Signage: Welcome signs, bar menus, and seating charts can be made with a simple frame and printed template.
- Favors: Pre-wrapped snacks, mini succulents, or personalized trinkets are simple to assemble in bulk.
- Aisle decor: Simple flower petals, lanterns, or ribbon markers add elegance without complexity. Explore aisle decor ideas for inspiration.
❌ Hire These (High Risk, Low Savings)
- Wedding gown alterations: A single mistake can ruin an irreplaceable garment.
- Catering for large groups: Food safety and logistics are not worth the risk for 50+ guests.
- Photography & videography: You only get one shot at these memories. Hire a professional photographer.
- Day-of coordination: A planner or coordinator protects your DIY work from logistical chaos.
- Complex floral installations: Large-scale ceremony florals require professional mechanics and perishable logistics.
- Formal cake design: Tiered cakes are structurally demanding. If you want a showstopper, trust a professional—or explore cake alternatives.
The takeaway is simple: DIY the things that are forgiving, repeatable, and visually impactful. Hire the things that are high-stakes, technically demanding, or time-sensitive. This hybrid approach is what separates a joyful DIY wedding from a stressful one—and it's why so many couples who attempt "full DIY" end up wishing they had delegated more. If you're still deciding how hands-on to be, our guide on small wedding ideas offers additional perspective on scaling your effort.
DIY Project Tiers: Entry-Level to Luxury
Not all DIY projects are created equal. To help you prioritize, we've organized the most common wedding projects into three tiers based on complexity, required tools, and the visual impact of the finished result. Use this framework to match projects to your skill level and available time.
Stationery & Signage
Design in Canva or a similar free tool, print at a local copy shop or online printer, and frame or mount on foam board. Minimal tools required—just a printer, scissors, and a frame.
Best for: Couples with zero craft experience who want a polished, personalized touch.
Table Centerpieces
Combine pre-made silk or dried floral garlands with candles and simple vases. No wiring or floral foam needed—just arrange and place.
Best for: Couples who want maximum visual impact with minimal assembly time.
Wedding Arch Decorating
Requires a bare frame, zip ties, floral wire, and a few hours of assembly. The technique is forgiving, and the result is the ceremony's biggest visual statement.
Best for: Couples with a helper or two who can dedicate an afternoon to assembly.
Bouquets & Boutonnieres
Using high-quality silk flowers or dried florals, you can assemble bouquets with floral tape and ribbon. No water source needed, so they last all day.
Best for: Couples who want personal florals but are comfortable with light crafting.
Custom Photo Backdrop
A larger-scale project involving a frame, fabric draping, and lighting. Requires more materials and careful setup, but doubles as a guest photo station.
Best for: Couples with a clear vision and a dedicated build day with helpers.
Full Tablescape Design
Layering linens, chargers, glassware, and florals across every table. High-impact but time-intensive, and requires sourcing enough matching supplies for the full guest count.
Best for: Couples with a cohesive design vision and a reliable sourcing plan.
💡 Pro Tip: Start with entry-level projects to build confidence and momentum. Many couples discover that one successful DIY project—like stationery—gives them the skill and motivation to tackle a mid-range project like the arch. The key is to space projects out over several months rather than attempting everything in the final weeks. If you're working with a professional vendor team for the rest of your wedding, be transparent about your DIY plans—photographers and coordinators often have valuable tips for making DIY elements look their best in photos.
High-Impact DIY Projects That Save Big
If you only have time for a handful of projects, focus on the ones that deliver the most savings and visual payoff. Based on real weddings and planning data, these are the projects that consistently rank highest for return on effort.
1. The Wedding Arch (The Ceremony Focal Point)
The arch is the single most photographed element of your ceremony, which is why rental companies and florists charge a premium to supply and decorate one. A bare arch frame is an entry-level investment, and decorating it yourself with silk garlands takes an afternoon. You control the color story, the floral density, and the draping style. For a complete walkthrough of frame types, decoration techniques, and what to buy, see our DIY wedding arch guide.
2. Centerpieces (The Reception Workhorse)
Centerpieces are the most numerous decor item at any wedding—and therefore the most expensive when outsourced. A DIY approach using pre-made garlands, pillar candles, and simple vessels keeps costs down and makes setup predictable. Because each table gets the same treatment, mistakes are easy to fix and hard to notice. Browse centerpiece supplies for a full sourcing list, or explore wedding flower ideas if you're planning a floral-forward look.
3. Stationery Suite (The First Impression)
Invitations, save-the-dates, menus, and place cards set the tone for the entire event—and they're among the easiest projects to DIY. Design in a free tool, print affordably, and add a personal touch with ribbon or wax seals. If you're mailing save-the-dates for a destination celebration, our destination save-the-date guide covers the etiquette and timing. For the invitation itself, see wedding invitation guidance.
4. Signage (Small Projects, Big Personality)
Welcome signs, bar menus, unplugged ceremony notices, and seating charts are small, forgiving projects that add huge personality. A simple frame with a printed design looks custom and costs very little. Place cards in particular are a great opportunity to personalize—see our place card ideas for inspiration.
5. Favors (The Personal Touch)
Favors are a beloved DIY category because the sky is the limit: pre-wrapped snacks, mini potted succulents, personalized ornaments, or handmade soaps. Assembly can be done in bulk on a single afternoon, and the personal touch is genuinely appreciated by guests. Just keep quantities manageable—order a small buffer of extras.
Smart Supply Buying Guide
Sourcing the right supplies is where DIY couples win or lose. The goal is to buy materials that look premium, hold up through the event, and don't require specialized tools. Here's a framework for buying smart at every tier.
- Buy frames, not completed decor. A bare arch or backdrop frame costs a fraction of a pre-decorated rental and can be resold afterward. This is the foundation of the DIY savings model.
- Choose high-quality silk florals over fresh for arches and centerpieces. They survive heat, don't wilt in photos, and can be assembled days in advance. Fresh flowers are best reserved for personal bouquets handled by a florist.
- Buy pre-made garlands rather than loose stems. Pre-made greenery garlands save hours of wiring and give a consistent, lush look with minimal skill required.
- Keep a running list of compatible supplies. Zip ties, floral wire, floral tape, and ribbon are the "connective tissue" of nearly every DIY project. Buy them in bulk early and keep them organized.
- Factor in shipping time. Bulk online orders often take 2-3 weeks. Order supplies at least a month before your planned assembly date to allow for replacements if something arrives damaged.
- Test one sample before buying in bulk. Assemble one centerpiece or one section of your arch before committing to a full order. This single step prevents costly over-purchasing.
- Coordinate your supply palette with your vendor team. Share your DIY plans with your photographer and coordinator so they can advise on lighting, placement, and backup plans.
Where to Shop: Big-box retailers, craft stores, and online marketplaces are the three main supply channels. For a curated list of products we recommend for DIY weddings—including arch frames, silk florals, and stationery supplies—see the product section at the bottom of this page. You can also explore our full wedding planning sites guide for additional vendor and supply resources.
The DIY Wedding Timeline
A realistic timeline is the difference between a joyful DIY experience and a frantic one. Here's a month-by-month framework based on the complexity of your projects, adapted for a typical 9-12 month engagement.
Months 9-12: Planning & Sourcing
- Finalize your project list. Decide which 3-5 projects you're DIYing and which you're outsourcing.
- Create a supply budget. Allocate funds per project and build in a buffer for test samples.
- Source and test. Order sample supplies, assemble one test piece, and finalize your vendor contracts for photography, catering, and coordination.
- Design stationery. Finalize invitation designs and place first print orders.
Months 3-6: Production & Assembly
- Bulk-order supplies. Order everything for arches, centerpieces, and favors—allowing 2-3 weeks for shipping.
- Assemble non-perishable items. Build signage, stationery suites, and favor packaging. Store in labeled bins.
- Build the arch. Assemble and decorate the arch frame. Do a full "dress rehearsal" setup in a garage or backyard.
- Confirm logistics. Review your day-of plan with your coordinator or venue.
Final 48 Hours: Assemble any fresh floral elements, transport all supplies to the venue, and set up the arch and centerpieces. If possible, schedule setup for the afternoon before the wedding so you're not working on the morning of the event. This buffer is the single best investment you can make in your own peace of mind.
Day-of DIY Logistics & Backup Plans
Even the best-planned DIY wedding needs a contingency plan. Keep these four rules in mind to protect your hard work on the day itself.
1. Assign a Setup Crew
You cannot be the bride or groom and the setup coordinator simultaneously. Recruit 2-3 trusted friends or family members (not your wedding party, who will be busy getting ready) to handle setup and takedown. Provide a written checklist with photos of the final result so there's no ambiguity.
2. Have a Weather Backup
Outdoor arches and centerpieces are vulnerable to wind and rain. Review your venue's backup plan and have a quick way to secure your arch—sandbags or weighted bases are essential. For outdoor ceremonies, have a plan for moving decor indoors quickly if needed.
3. Prepare an Emergency Kit
Bring a small kit with zip ties, floral wire, scissors, extra ribbon, tape, and a hot glue gun. A wedding emergency kit is especially valuable for DIY weddings because it lets you fix minor issues on the spot instead of panicking.
4. Take It Down the Same Night (Or Delegate)
Most venues require decor removal immediately following the event or early the next morning. Assign this task in advance to your setup crew, and be clear about what you want to keep, donate, and discard. Label bins so items don't get mixed up with rentals.
DIY Wedding FAQs
Ultimately, a DIY wedding is about intention. Every project you take on is a chance to make the day feel more like you—and every project you delegate is a chance to protect your energy for the moments that matter most. Start with your highest-impact projects, plan your timeline carefully, and give yourself the same grace you'd give a friend. Your wedding doesn't have to be perfect to be unforgettable; it just has to feel like home.