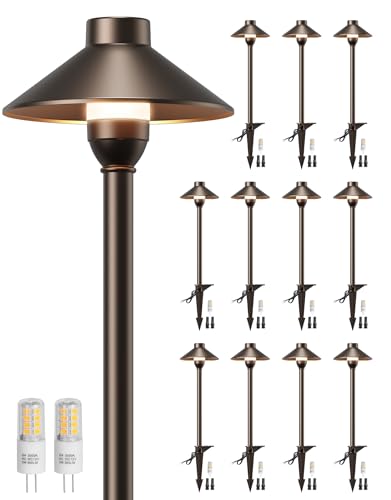
Low Voltage Landscape Lighting: A Complete Guide
"Transform your outdoor space with safe, energy-efficient, and stunning low voltage lighting. Learn how to plan, install, and enjoy your illuminated landscape."
Low voltage landscape lighting is one of the most impactful upgrades you can make to your home's exterior. It enhances safety, boosts curb appeal, and extends your outdoor living space well into the evening. Unlike traditional 120-volt systems, low voltage lighting operates on just 12 volts, making it safer for DIY installation and significantly more energy-efficient. This guide will walk you through everything you need to know to design and install a professional-quality system yourself.
Why Choose Low Voltage Lighting?
The advantages of low voltage systems go far beyond simple illumination. They are the preferred choice for homeowners and landscapers alike for several compelling reasons.
- Safety First: The 12-volt current is harmless if accidentally cut or exposed to moisture, making it ideal for gardens and pathways where children and pets play.
- Energy Efficiency: These systems consume far less power than their line-voltage counterparts, reducing your electricity bills and environmental footprint.
- Easy Installation: You don't need to dig deep trenches or run conduit. Cables can be buried just a few inches underground or even laid on the surface in some cases.
- Design Flexibility: The wide variety of fixtures—from sleek modern bollards to vintage-style path lights—allows you to create a custom look. You can also easily add or move lights as your landscape evolves.
- Longer Bulb Life: The lower voltage puts less stress on bulbs, especially LEDs, which can last for many years.
For those planning an outdoor event, such as a wedding or party, this type of lighting can create a magical, golden-hour ambiance that lasts all night. It’s an essential element for any outdoor venue.
Understanding the System Components
A typical low voltage system is surprisingly simple, consisting of just a few key parts. Understanding each one is crucial for a successful installation.
1. The Transformer: This is the heart of the system. It plugs into a standard outdoor GFCI outlet and converts 120-volt household current down to 12 volts. Transformers come in various wattages and often include timers, photocells, and smart home connectivity.
2. The Cable: A direct-burial, stranded copper wire carries the low voltage current from the transformer to the fixtures. Common gauges are 16, 14, and 12; thicker wire (lower gauge number) is needed for longer runs to prevent voltage drop.
3. The Fixtures: These are the lights themselves. They come in countless styles, including path lights, spotlights, floodlights, deck lights, and well lights. Most modern fixtures use energy-efficient LED bulbs.
4. Connectors: These are the waterproof splices that connect each fixture to the main cable. They are typically silicone-filled or gel-filled to prevent corrosion and water intrusion.
Planning Your Lighting Design
Before you buy a single component, take the time to plan. Great lighting design is about layering and highlighting, not just flooding an area with light.
- Identify Your Goals: Are you lighting a path for safety? Highlighting a beautiful tree or architectural feature? Creating a welcoming entryway? Your goals will determine the types of fixtures you need.
- Sketch Your Layout: Draw a simple map of your yard. Mark the locations of your transformer, key focal points (trees, statues, walls), pathways, and any existing power outlets. This will help you estimate cable runs and the number of fixtures.
- Choose Your Fixtures: Use a mix of fixture types for a professional look.
- Path Lights: Use these to line walkways and driveways. Space them 6-8 feet apart for even illumination.
- Spotlights: Aim these upwards to highlight trees, walls, or sculptures. This technique is called "uplighting."
- Floodlights: Use these for broad washes of light on large areas like a patio or driveway.
- Well Lights: These are buried in the ground and point upwards, ideal for creating a subtle, dramatic effect on walls or low shrubs.
Sizing Your Transformer Correctly
This is the most critical step to avoid frustration. An undersized transformer will cause lights to dim or flicker. The rule of thumb is to never load a transformer to more than 80% of its total capacity.
💡 The Simple Math: Add up the wattage of all the bulbs you plan to install. For example, if you have 20 LED path lights that use 3 watts each, your total load is 60 watts. To find the minimum transformer size, divide your total load by 0.8. In this case, 60 / 0.8 = 75 watts. So, a 75-watt or 100-watt transformer would be a safe choice.
If you plan to expand your system later, it's wise to buy a transformer with a higher capacity than you currently need. Most homeowners find a mid-range or premium transformer with a capacity between 150 and 300 watts offers plenty of room for growth and features like smart controls.
DIY Installation Tips & Tricks
Installing a low voltage system is a rewarding weekend project. Follow these steps for a smooth process.
- Mount the Transformer: Place it near an outdoor GFCI outlet, ideally at least 12 inches above the ground to protect it from water. Some transformers can be mounted on a wall or stake.
- Run the Main Cable: Lay the cable along your planned route. You can bury it 2-3 inches deep or use landscape staples to secure it to the ground. Leave a little slack at each fixture location.
- Connect the Fixtures: Use the waterproof connectors to attach each fixture to the main cable. Follow the connector's specific instructions carefully—usually, you align the arrows and clamp down firmly to pierce the cable's insulation.
- Test Before You Bury: Once all fixtures are connected, plug in the transformer and test the system. Check for any dim lights or non-functioning fixtures. Troubleshoot now before you bury the cable.
- Adjust and Aim: Once everything is working, aim your spotlights and adjust the height of your path lights to achieve the desired effect. Evening is the best time for this final adjustment.
This kind of thoughtful preparation is similar to planning a major event, like when you choose a venue or choose a photographer; the details make all the difference.
Maintenance & Troubleshooting
Low voltage systems are relatively low-maintenance, but occasional checks will keep them performing beautifully for years.
- Keep Fixtures Clean: Wipe down lenses and fixture housings with a damp cloth to remove dirt and debris.
- Check Connections: Periodically inspect the connections at each fixture to ensure they are still tight and free of corrosion.
- Trim Vegetation: Keep plants and grass trimmed away from fixtures to prevent overheating and to keep the light path clear.
- Troubleshooting Dim Lights: If lights at the end of a run are dim, it's likely voltage drop. Consider upgrading to a thicker gauge wire or reconfiguring your cable runs to be shorter.