Dessert Table Ideas on a Budget
"Create a show-stopping dessert display without breaking the bank. Smart styling, clever sourcing, and DIY magic."
A beautifully styled dessert table is one of the most photographed elements of a wedding reception. It's a focal point that invites guests to indulge, a visual representation of your theme, and a chance to add personality to your celebration. But between artisanal cakes, gourmet cookies, and elaborate displays, the costs can add up quickly.
The good news? You don't need a luxury vendor to create a magazine-worthy display. With strategic planning, smart sourcing, and a few clever DIY tricks, you can build a stunning dessert table that looks like it belongs in a bridal magazine—all while staying well within your budget. This guide will walk you through every step, from choosing the right desserts to styling the display like a pro.
💡 The WeddingClever Approach: Focus your budget on taste and presentation, not quantity. A curated selection of 4-6 high-quality dessert types, displayed beautifully, will always impress more than a crowded table of mediocre treats. And remember: the display itself—the stands, the linens, the lighting—is often what makes the biggest visual impact.
Plan Your Dessert Table Strategy
Before you buy a single cookie or borrow a cake stand, you need a plan. Randomly assembling desserts leads to a chaotic display and wasted money. Start by answering these key questions:
1. How Many Desserts Do You Actually Need?
The golden rule for dessert tables is 2-3 pieces per guest. If you're also serving a traditional wedding cake, you can reduce this to 1-2 pieces per guest. This means for 100 guests, you need roughly 150-200 individual dessert pieces if you have a cake, or 200-300 if you don't. This sounds like a lot, but when you break it down into different categories—cookies, bars, tarts, mini cupcakes—it becomes manageable and affordable.
Pro Tip: Always round up slightly. Running out of dessert is a wedding faux pas you want to avoid. Leftovers can be packed into cute favor boxes and sent home with guests, extending the celebration.
2. Choose a Cohesive Theme
Your dessert table should feel like a natural extension of your overall wedding theme. A cohesive look—whether it's rustic, modern, boho, or classic—makes even simple desserts look intentional and elegant. Choose a color palette (2-3 colors maximum) and stick to it for your desserts, linens, and decor. This is one of the most effective budget strategies because it creates visual impact without requiring expensive ingredients.
3. Decide on Your Dessert Categories
A well-balanced dessert table offers variety in texture, flavor, and shape. Aim for:
- One focal dessert: A small cutting cake, a signature pie, or a show-stopping tart.
- Two bite-sized options: Cookies, brownies, or macarons.
- One "fun" item: Chocolate-dipped pretzels, Rice Krispie treats, or popcorn bags.
- One fresh element: Fruit skewers or mini fruit tarts for a lighter option.
- One beverage pairing: A signature cocktail (see our signature cocktail ideas) or a dessert wine.
Smart Sourcing: Where to Buy Budget Desserts
This is where the real savings happen. You do not need to order everything from a high-end bakery. Mixing sources is the secret to an affordable yet impressive dessert table.
Wholesale Clubs & Supermarkets
Stores like Costco, Sam's Club, and even your local supermarket bakery offer surprisingly high-quality desserts at a fraction of boutique prices. Think:
- Mini cheesecakes and tarts
- Gourmet cookies (often sold in bulk)
- Brownie bites and blondies
- Macarons (increasingly available at wholesale clubs)
- Sheet cakes that you can cut into smaller portions and display on pretty stands
The key is to unpackage and display them beautifully. No one will know they came from a wholesale club if they're presented on elegant stands with fresh garnish. For more ideas on sourcing, check out our guide to wedding dessert table treats.
Local Bakeries & Grocery Stores
Don't overlook your local grocery store bakery. Many offer excellent custom cakes and dessert platters at mid-tier prices. Ordering a simple, single-tier cake and decorating it yourself with fresh flowers or a custom cake topper is a classic budget hack. For a deeper dive into cake options, see our complete wedding cake guide.
DIY & Semi-Homemade
Making some desserts yourself can save significantly, but be realistic about your time and skills. The best candidates for DIY are:
- Chocolate-dipped pretzels, strawberries, or Oreos
- Rice Krispie treats (cut into fun shapes)
- Brownies and blondies (from a box mix is perfectly fine!)
- Popcorn bags with custom labels
- No-bake cheesecake bites or truffles
💡 Budget Math Example: A boutique bakery might charge a premium per dozen for custom cookies. A wholesale club offers a much lower per-piece cost for similar quality. By mixing a few boutique items (like a small cutting cake) with wholesale and DIY items, you get the best of both worlds: a custom look at a fraction of the cost.
Styling Secrets for a Luxe Look
The difference between a "potluck" dessert table and a "professional" one is almost entirely in the styling. Here's how to elevate your display:
Create Height and Levels
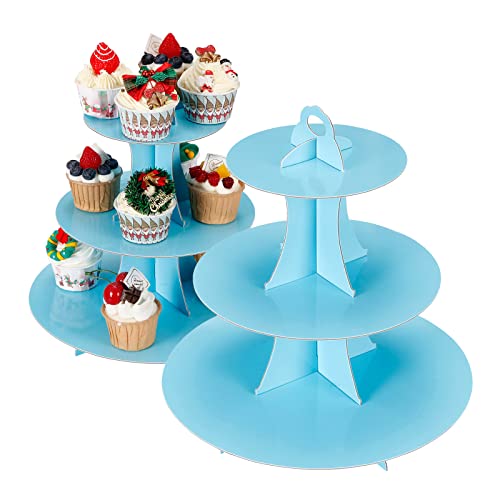
A flat table is boring. Use cake stands, wooden crates, overturned boxes covered in fabric, and stacks of books to create different levels. This adds visual interest and allows you to fit more desserts in less space. A tiered tray is also a fantastic investment—it's affordable and instantly adds elegance.
Use a Cohesive Color Palette
Stick to 2-3 colors for your linens, stands, and dessert garnishes. This creates a unified look that feels intentional. For example, a classic palette of white, gold, and soft greenery works for almost any theme. If you're planning a specific theme, check out our guides on fall wedding colors for seasonal inspiration.
Add Fresh Greenery and Affordable Florals
You don't need expensive floral arrangements. A few sprigs of eucalyptus, baby's breath, or even fresh herbs like rosemary can transform a plain table. Place them in small vases or lay them directly on the table around the dessert stands. For more floral inspiration, see our ceremony flower arrangements guide.
Don't Forget Lighting
Lighting is the secret weapon of professional stylists. Add a few candles (votives or tapered) or a string of fairy lights draped around the table. This creates a warm, inviting glow that makes everything look more appetizing and romantic. For more lighting ideas, see our wedding lighting guide.
Styling Tip: Use a pretty backdrop behind the table. This could be a simple fabric drape, a hanging garland, or even a decorative screen. It frames the table and makes it feel like a designated "moment" in your reception.
DIY Decor & Display Ideas
DIY decor is where you can really personalize your dessert table while saving money. Here are some of our favorite budget-friendly projects:
DIY Cake Stands
You can make beautiful cake stands using a plate and a candlestick or a small bowl. Use strong adhesive (like E6000) to attach them together. Spray paint mismatched plates and candlesticks in a uniform color (like gold or white) for a cohesive look. This is a fraction of the cost of buying new stands.
Fabric-Covered Boxes
Wrap sturdy cardboard boxes in pretty fabric or wrapping paper to create custom risers. This is incredibly cheap and allows you to match your table's color scheme perfectly. You can use different heights to create a tiered display.
Custom Signs and Labels
Use Canva or another free design tool to create cute labels for each dessert. Print them at home or at a local print shop and attach them to cardstock or small frames. This adds a professional touch and helps guests identify what they're eating. For more signage ideas, see our custom wedding signage guide.
What You Need to Buy:
• Assorted cake stands (or DIY supplies)
• Wooden crates or boxes
• Fabric remnants or wrapping paper
• Small vases or jars
• Fresh greenery or affordable flowers
• Candles and votives
• Cardstock and a printer for labels
Check out our curated centerpiece supplies list below for the exact products we recommend!
Dessert Table Backdrops
A backdrop can be as simple as a fabric drape or as elaborate as a balloon arch. For a budget-friendly option, use a large piece of chiffon or tulle draped over a simple frame, or create a garland of paper fans or dried flowers. If you're using dried flowers, check out our dried flower guide for inspiration.
Layout & Flow: Making It Work
Even the most beautiful dessert table needs to be functional. Here's how to set it up for optimal flow:
- Position the table away from the main food line: You don't want guests blocking the buffet while they're getting dessert. Place the dessert table in a separate but visible area.
- Create a natural flow: Arrange the table so guests can move from left to right. Start with plates and napkins, then move through the dessert options, and end with utensils and favor boxes.
- Provide enough space: Don't overcrowd the table. Leave space between each dessert stand so guests can easily reach in without knocking things over. A good rule is to have one dessert item per every 8-10 guests on the table at a time, and replenish as needed.
- Label everything: This is especially important if you have guests with dietary restrictions. Clearly label which desserts are gluten-free, nut-free, or vegan.
💡 Layout Tip: Place the napkins and plates at the beginning of the table, and the utensils and favor boxes at the end. This prevents guests from having to juggle too many items at once. Also, consider having a separate small table for beverages to avoid congestion.